

Hi! Here comes an Easel card I made with the dies from the Vintage Box, Third Edition. I will first show you the card, then comes a step by step of how it is made. If you ordered the dies you will find my card inside the leaflet.


I have used Distress Ink for my colouring. And the papers are from Maja Design.


I will now give you the step by step, it is devided in three.
Picture 1-7: How to make a Trip-Trap Easel Card


1-2 Use the background die to cut out the base of the card.


3-4 Fold the upper part on the half.

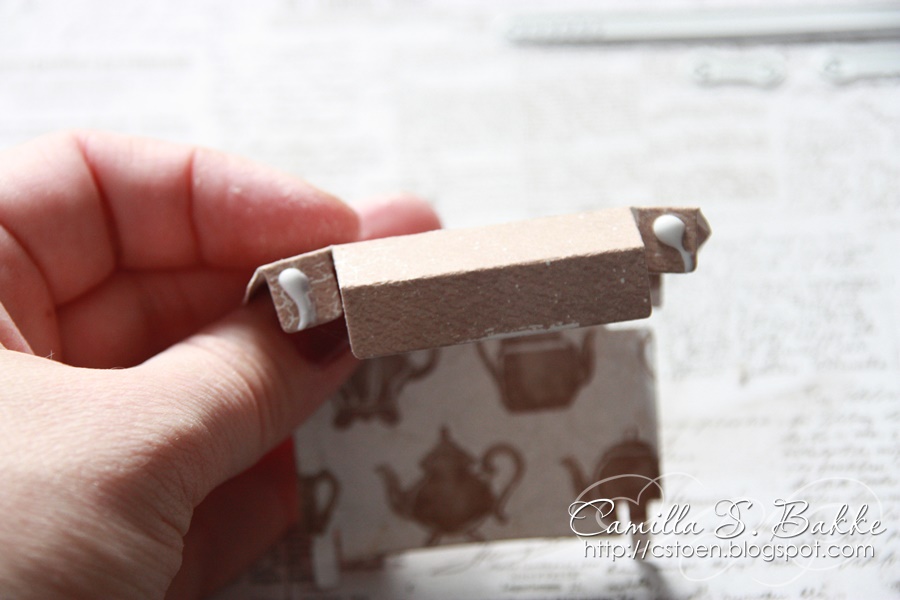
5 Fold at 3, 8 and 13 cm.

6 Then fold it like this.

7 The papers shall be placed like you see on the photo.
Picture 8-23: How I made the propel (front of
an aeroplane)

8 Cut a paper at 10x7,5. Then fold it at 1,5 ,4 and 6 cm.

9 Make 10 cuts with your scissors, with approximately one cm between each.


10-11 Glue it together like this.


12-13 Cut out the propeller.

14 Make holes in all the parts.


15-16 Use a claps to fasten the propeller.

17 Fasten them together.

18 Now it is time to fasten the front of the airplane to the card. First mark where to put it in the middle of the card, by set some points.


19-20 Cut the papers like this to make a smooth transition.

21 Fold the parts like this.

22 Use a rubber to take away the points.

23 Put them together like this.
Picture 24-28: How I put the card together

24 Make the tag, use the text and make a stamp.


25-28 Put the card together like this.
Picture 29-43: How the suitcase together

29 What you need to make the suitcase.

30 Start with this part. Fold it where it is supposed to be folded. You will see little marks on the paper.
31 Put some glue at this parts.

32 Then press the papers together.

33 Some more glue at the part like this.


34-36 Do the same on the other side of the suitcase.


37-38 Fasten the eight little “packmen” on the corners of the suitcase.

39 Use the largest handle and place it like this.

40 Then the two smaller like this.


41-43 Put on the belt.
That's it! Thank you so much for reaching the end of this loooong step by step!
Take care!
Love from Camilla
3 kommentarer:
What an incredible amount of work! It is so beautifully done. Love the dies you used. Magnolia products are difficult to come by here in the States.
oh wow!
gorgeous!
what a beautiful card.
Legg inn en kommentar